
Pizza box for A5 cards
Cut a 12” x 8” piece of cardstock
Score on the vertical side at 1” and 7”
Score on the horizontal side at 1”, 51/2”, 61/2”, 11”


Fold all score lines and ink them.

Top of box:
Cut 1 piece of cardstock at 5 ¾” x 4 ¼”
Cut 1 piece of designer paper at 5 ½” x 4”
Sides of box:
Cut 2 pieces of cardstock at 5 ¾ ” x ¾”
Cut 2 pieces of designer paper at 4 ¼” x ¾”
Ink all edges

Adhere all pieces to top and sides of box
(I added other pieces to decorate the top of the box)

Glue box together by placing adhesive on the 4 corners
and on the two tabs in the middle of the box.

I hope you can see with the two following photos on what I mean as
I forgot to take photos of the actual box I was working on.


Decorate as desired.

I used the 1” hole punch to punch a half circle to open the box easier

A couple of other boxes I completed with cards to match..
A male set…


A female set…


..................................................................................................................................................................
This is a card I cased awhile ago but changed the measurement to suit.. Easy to do and quick, you could change the butterfly to poinsettias which is what I am going to do or large snowflakes..
Cut 1 piece of cardstock 9” x 4 ¼ “
Score at 4 ½”

Cut 1 piece of cardstock at 4 3/8” x 4 3/8”
Cut 1 piece of embossed cardstock at 4 ¼” x 4 ¼”

Cut 4 pieces of cardstock at 1 ½” x 1 ½”
Cut 4 pieces of cardstock at 1 5/8” x 1 5/8”
(ink with your choice of stamp)

Round corners as shown
( I am going to use poinsettia’s next card)


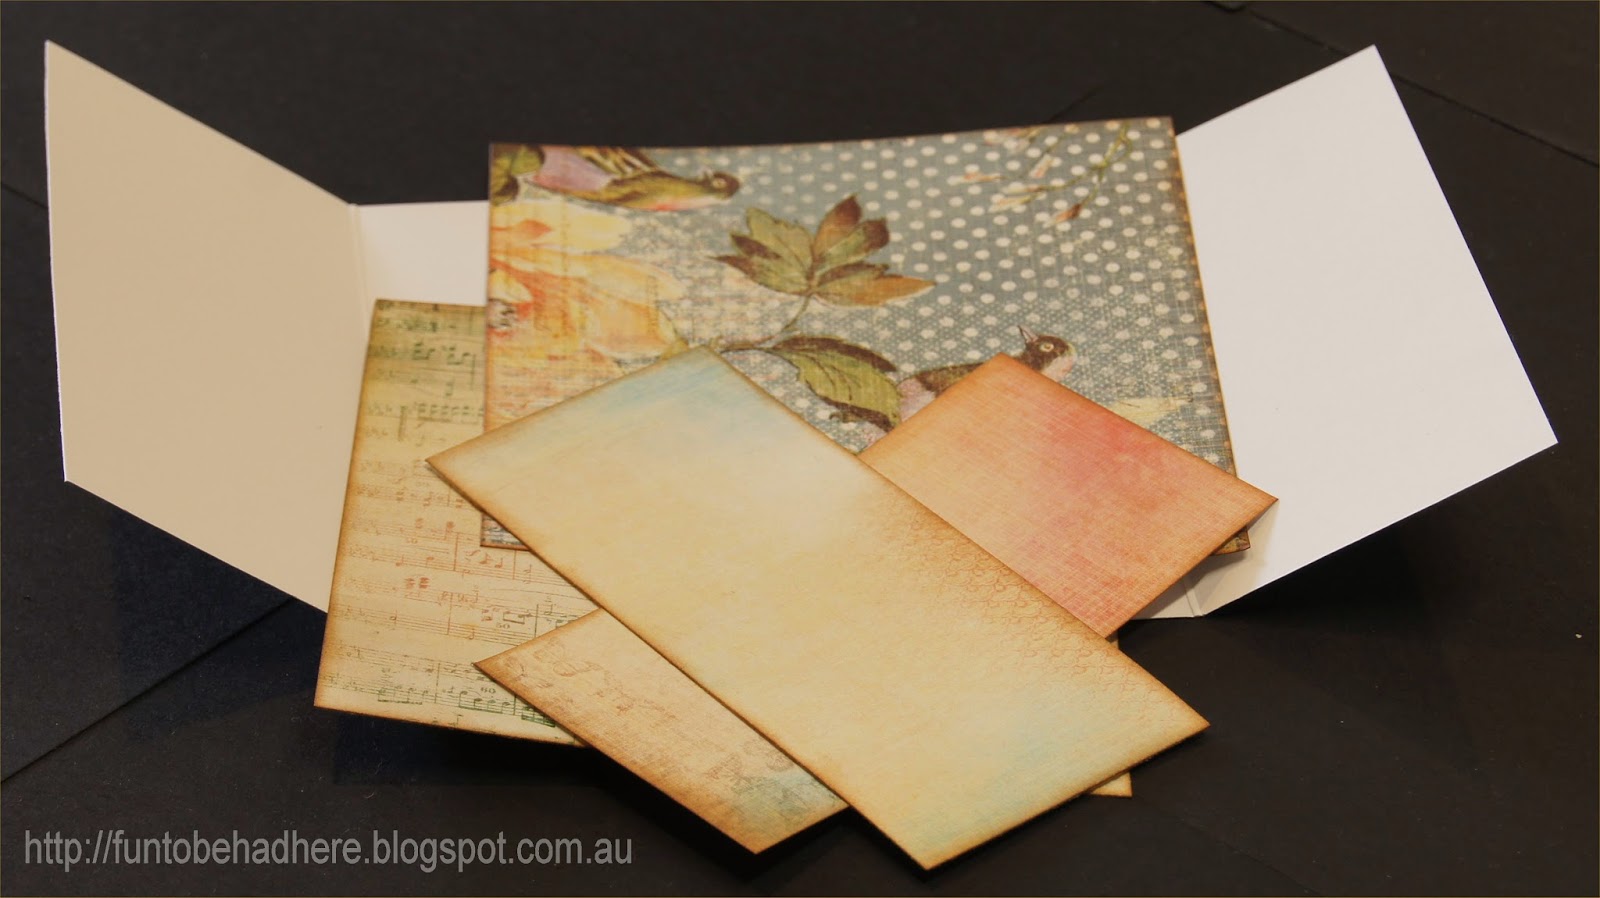
Little Photo Album Book
LITTLE ALBUM BOOK

Pages - Cut 4 pieces of cardstock at 2 ¾ inches x 11 inches (6.6 cm x 28cm)
Score at 3, 6, 9 inches, fold all score lines using mountain and valley folds(7.6 cm, 15 cm, 23cm)

Cover - Cut 1 piece at 2 ¾ inch x 11 inch (6.6cm x 28cm)
Score at 3, 3 ½, 6 ½, 7, 9 inches, fold all score lines (7.6cm, 8. 9cm, 17cm, 18cm, 23cm)Adhere the end tab (over on itself to make the flap on the front)
Round the corners.
> < (End tab)

Adhere the smaller tabs of the pages behind the larger squares of the next page as shown below.

Cut of the tab on the last page as shown

Adhere by gluing two pages together only on the two sides as shown if you want tags.
(if no tags then glue all 4 sides).

Pages now should look like this

Pages will now look like a star pattern (you can see where the tags fit)

Adhere the 2 back pieces of your pages to the cover as shown.


Cut 2 pieces of patterned paper 2 5/8 inch x 2 7/8 inch (6.3cm x 6.9cm)
-1 piece of patterned paper 2 5/8 inch x 1 ¾ inch (6.3cm x 4.1cm)
Punch 1 x scallop circle 1 ¾ inch (Stampin Up)
- 1x circle 1 ½ inch (Stampin Up)- 10 x circles ¾ inch (Stampin Up)
- Scallop edge border (Stampin Up)
Ink all edges ( I used Distress Ink Vintage Photo)

Cut 5 tags at 2 ½ inches x 2 3/8 inches. (6.1cm x 5.8cm)
Mat with patterned paper just a fraction smaller than the tag and adhere as shown.I only matted one side for journaling, the other side I placed photos.

Decorate as desired …Stamp from The Birdsong Collection, ‘Creative tamping’

Samples of the same album book design..

3 BUTTERFLY CARD

1 piece of cardstock at 4 inches x 5 ¾ inches (10cm x 14.2cm)


Adhere the butterflies on the strip as shown.
Adhere the 2 hearts and add bling.


Ingredients:
1 strip of cardstock at 4 inches x 1 ¾ inches and emboss with the swiss dots embossing folder from Cuttlebug (10cm x 4.1cm)
1 piece of designer cardstock at 3 ¾ inches x 5 ½ inches (I used Family Jeans from gcd studios) (9.1cm x 3.7cm)
Die cut all 3 sized butterflies from the Joy Craft die in the cardstock
Die cut all 3 sized butterflies from the Joy Craft die in designer cardstock
1 piece of lace at 29 cm, then cut that in half
Die cut the smallest heart from Classic Heart and Classic Scallop Heart die from Spellbinders
Bling
Stampin Up Marina Mist Ink
Ink all the pieces of cardstock and adhere to the card as shown below, gluing the two pieces of lace on to the sides of the embossed strip before adhering to the designer cardstock.
Ink all the butterflies and adhere only the body of them
together as shown..Adhere the butterflies on the strip as shown.
Same design but 2 different looks..
WINDOW CARD TUTORIAL
Window Card

Paper- Sweet Nothings – Kaiser Craft
Frilly Square #8 - Go Kreate Die
Tattered Floral Garden Die – Tim Holtz
Vintage Photo – Distress Ink
Cut 1 piece 10 inch x 5 inch cardstock -
Score @ 2 ½ inch , 7 ½ inch
Cut 1 piece 4 ¾ inch x 4 ¾ inch designer paper
Cut 1 piece 4 7/8 inch x 4 7/8 inch designer paper
Cut 2 pieces 4 7/8 inch x 2 ¼ inch designer paper
Tape die with the blade side up as shown.

Adhere the 2 pieces 4 7/8 inch x 2 ¼ inch designer paper to the inside
of the card on the sides.
Place the 4 7/8 x 4 7/8 designer paper on top of the closed card
As shown below.. ( I use a small piece of temp tape in the centre to hold in place )

Run it through the cutting machine

Cut the front designer paper in half then placing the die on the cut area
Blade side down, trace around it with a pencil. Do this for both pieces.

Cut around the area following the pencil line

Cut off approx 1/8 inch off each side of the white cardstock (top and bottom)
Cut off approx 1/8 inch off each side of the designer paper (top and bottom)
(this step is for the < v > centre pieces only)

Adhere all pieces to the card base..

Inside the card..

The finished card...

My FIRST Tutorial:
JOY FOLD CARD
Items Needed:
- Black card stock
- White card stock
- Tim Holtz distress ink
- Double sided tape
- Glue
- Punch
- Score pal
- Paper cutter
- Ribbon, button, lace
Hint: I work out which paper I am going to use and once cut
write on the back of it where it is going to fit on the project, example:
‘front flap inside’. I cut all my pieces first..
this at 4 ¼ inches…


Cut a piece of black
card stock at 3 inches x 6 inches and score
this at 3 inches…


Cut one piece of white card stock at 4 inches x
4 inches

Cut 3 pieces of white card stock at 2 7/8 inches x 2 7/8 inches

Cut one piece of designer paper at 3 7/8 inches x 3 7/8 inches.

Cut one piece of designer paper at 2 6/8 inches x 2 6/8 inches.

Cut one piece of designer paper at 3 7/8 inches x 1 ¾ inches.

Cut one piece of white cardstock at 4 inches x 1 7/8 inches.

Ink the edges of all the pieces of cardstock

Glue or stick using double side tape..


Stick or glue 2 of the 2 7/8 sq pieces of white cardstock to
inside the 3 inch x 6 inch black cardstock.

Glue or stick the other piece of 2 7/8 inch sq piece of white cardstock
and the 2 6/8 inch sq DP to the front..
Glue or stick the 3 inch x 6 inch to the front of the base card..


Decorate the inside of the card.

Decorate the outside of the card.
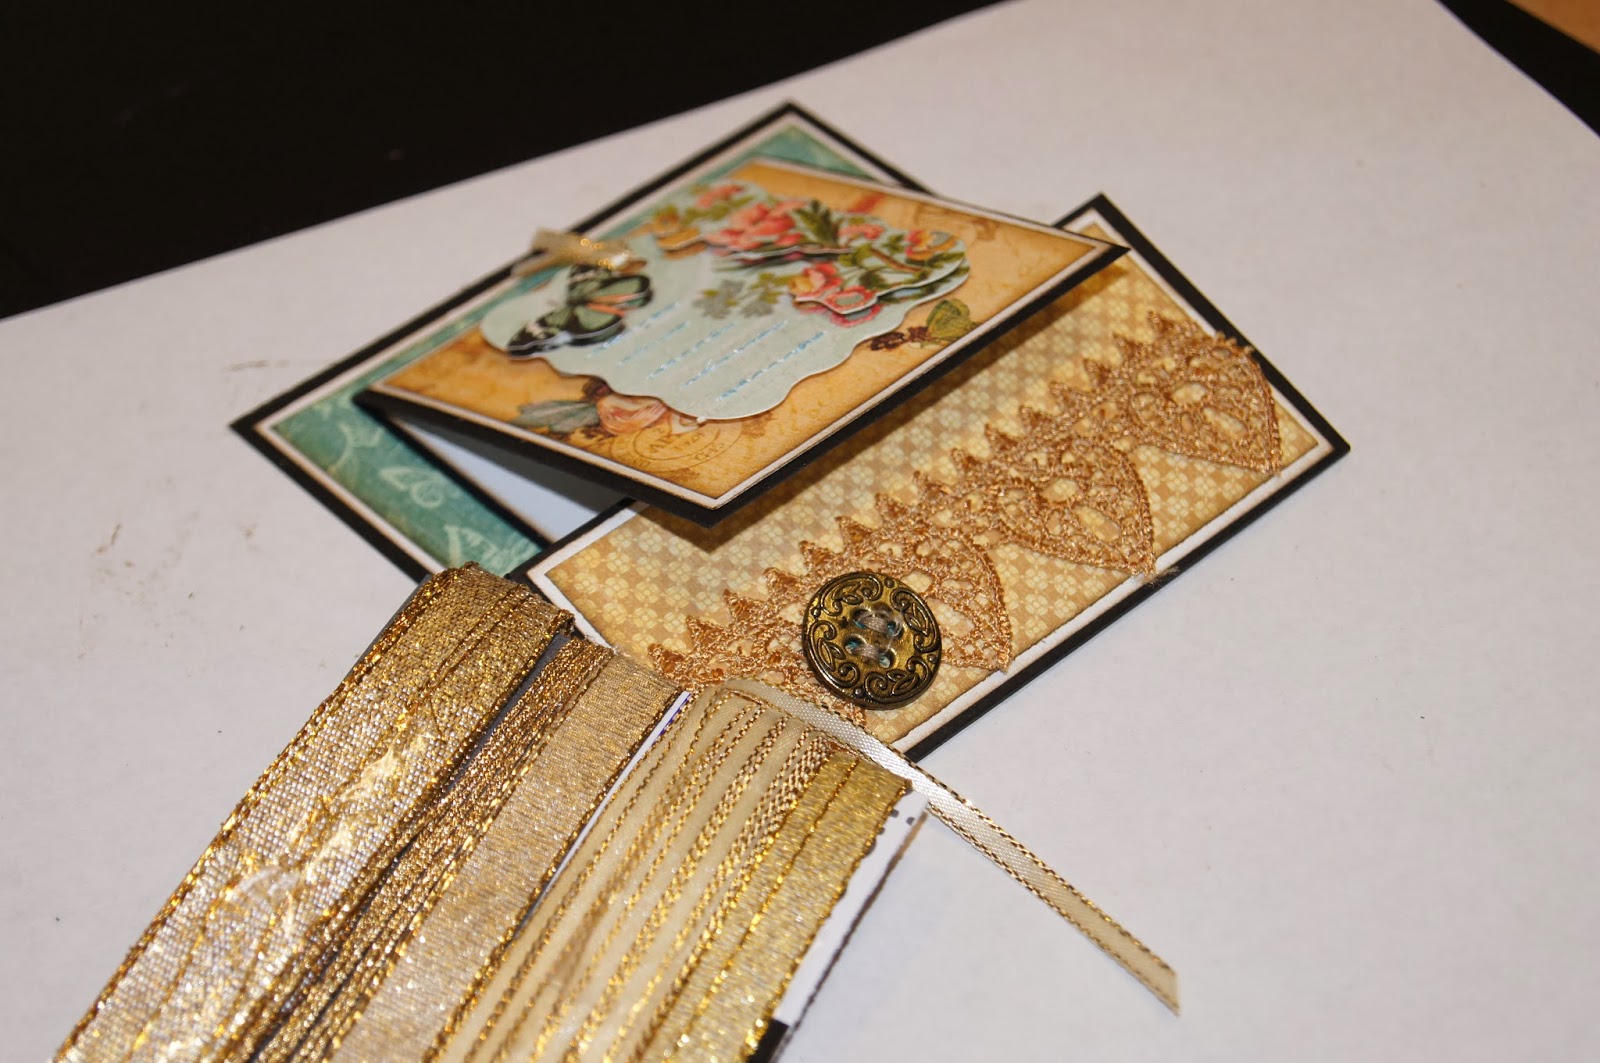
I added foam dots to the button..


The finished card..

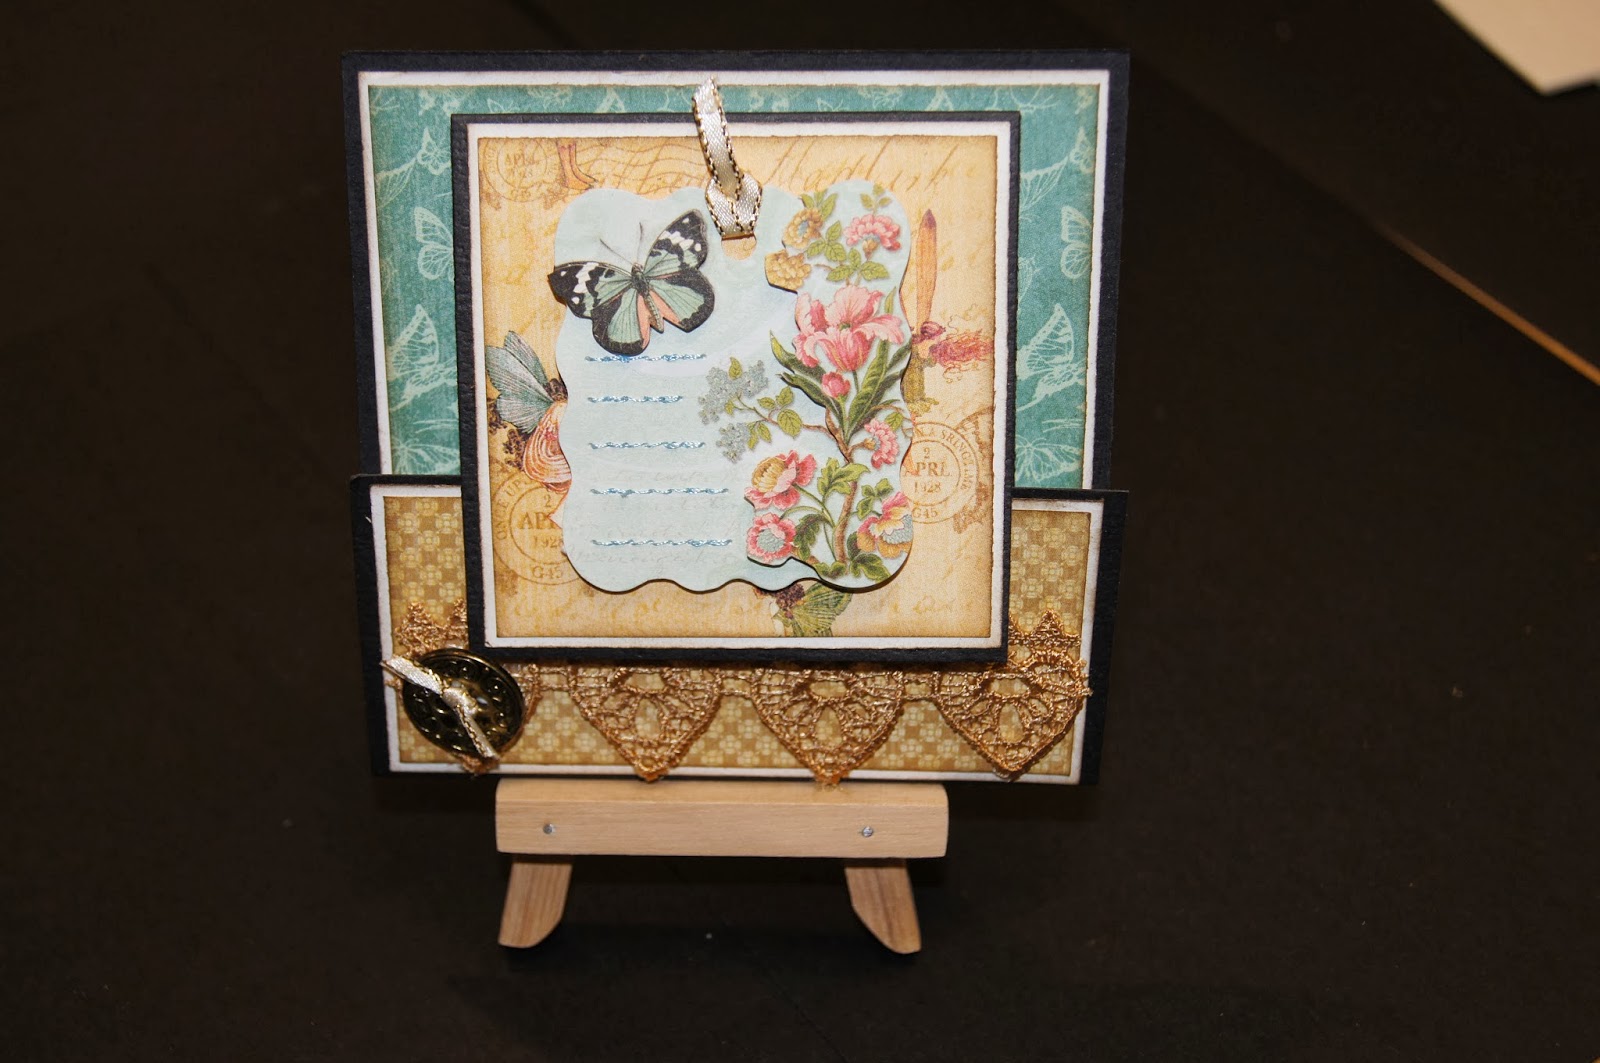
I used dimensional on the embellishments.

Beautiful Card! Thank you for this awesome tutorial! I want to make one!
ReplyDeleteyou are welcomed hun, enjoy
DeleteHi Donna love your Blog. Do you have tutorials for paper flowers?
ReplyDeleteChris U
Chris I apologise deeply as I did not see your remark and now its 5 months along lol. I vary rarely get comments I didn't see it.. As to your question I have several tutorials for flowers, you need to click on tutorials on right hand side and I have added a couple here which is on the top of page in tabs. (for some reason it allows me to place some here and others in the label tab, go figure.)I was and am going to make more but my camera threw in the towel sigh so am saving up for a new one.. Regards Donna and again My Apologies...
Delete